
First off, I want to say that the Sony a6500 is a great camera, especially when you consider the price right now. But today’s video is about the six biggest problems with the a6500, and how to fix them. These solutions also apply to the Sony a6300.
Sony Alpha a6500 camera on BH Photo Video, Adorama, Henry’s, eBay, Amazon
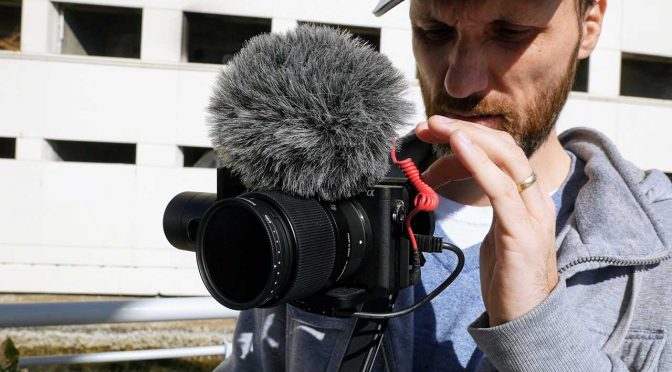
Here is my review of the Sony a6300. Both cameras use the same sensor and processor, so the image quality is the same. The main improvement of the a6500 is the inclusion of the in-body image stabilization.
As I say in the video, no camera is perfect. I came across six problems that really bugged me about the Sony a6500, but thankfully I was able to find a solution for all of them.
- Weak battery
- Bad LCD
- No In-Camera Timelapse
- Rolling Shutter
- Overheating
- Video Recording Time Limit
As great as the Sony a6500 is, one of its greatest features is also a negative. The camera is very small, so it has to use the small Sony batteries, which don’t last very long. The reason why this camera uses these batteries so fast is because of the other great features that require power; features such as the beautiful 4K video, in-body image stabilization, great autofocus, touch screen, and so on.
So there is an obvious fix for these weak batteries: buy more of them. There are actually a lot of great batteries for this camera that cost only a fraction of the original Sony batteries. I personally have at least 10 of these with me for a whole day of shooting (links below).
Wasabi Batteries and Charger for the Sony a6500 (a6300) on Amazon
Here are also great batteries from Watson: B&H
Another solution is to use an external battery like I did in my custom DIY camera rig. If you want more info, then check out my DIY $200 Camera Rig video here.
The first solution is free: use the EVF. It’s always visible in any light.
Of course, sometimes you can’t have your eye directly to the EVF, so the next solution is to get a monitor. There are great small monitors out there. One such monitor is the SmallHD FOCUS. I recommend getting the Sony Bundle, so you can also power the camera using the bigger battery that also powers the monitor. However, this solution is not cheap. It’s $599 at the time of this video.
Another great monitor that is very similar to the SmallHD FOCUS is a monitor from ANDYCINE. It’s only $179, and has all the same functionality as the SmallHD FOCUS. It’s not as bright, but still great for working outside in sunlight. It comes with a sunshade and a dummy battery, so you can power your Sony a6500 using the the monitor battery.
ANDYCINE monitor on Amazon
SmallHD FOCUS monitor on B&H, Amazon, Adorama, Henry’s, eBay, Newegg
In case you didn’t know, Sony cameras don’t come with any timelapse options. They have an app you can buy, but it costs $10 and is not even available in every country. However, there is an easy and free fix.
Just install a free 3-rd party Timelapse app (link below). It’s a simple app that works great. It takes photos for you at different intervals that you choose; plus you can set how many shots you want to take. Besides that, it will show you how long it will take to shoot this timelapse, and how long the final video will be (based on your chosen frame rate).
This app does not compile photos into a movie, which I don’t recommend doing anyway. It just takes a series of photos for you, and then you can easily convert those into a movie using any editing program.
In the second menu of this app, you will also get an option to shoot with the Silent Shutter, which I recommend you always do, so that you don’t wear out the mechanical shutter.
For video instructions on how to install this free Timelapse app, please see the bottom of the article.
If you’ve used the Sony a6500, then you know the rolling shutter distortion is pretty bad in 4K video. HD doesn’t have nearly as big of a problem. Fortunately, you can easily fix this in Adobe Premiere. Apply the Rolling Shutter Repair effect, and adjust the rate setting to whatever you like. That’s it!
I’ve had this camera overheat on me several times, and it just shut off on me in the middle of an important take.
To partially fix this, you can first go to the Set-up Menu Card number 2, and in the Auto Power OFF Temp settings change it from Standard to High. This will essentially let your camera stay on longer despite it getting hot. You will get a warning for longer before the camera actually shuts off. I think this is better than having the camera suddenly shut off on you.
Now, to really fix this overheating issue, I find the best thing to do is to keep the camera cool by opening up the LCD on the back and moving it away from the camera’s body. That let’s the heat from the camera’s body dissipate better; plus the LCD itself gets hot, so you definitely want to keep it away from the body.
Another thing I noticed is that whenever shooting in 4K on this camera, the processor inside heats up, as it has to work extra hard. It also pulls in extra electricity in 4K, which causes the batteries to overheat and die quickly. So, if you get the dummy battery solution I talk about earlier, it will help a lot.
Also, if you get an external recorder like the Atomos Ninja Inferno that I use, then suddenly the camera doesn’t have to work hard to compress and record all that 4K data. Plus, you also get the benefit of recording in a better codec and you get a nice big visible LCD display with HDR options, which is great when recording in S-Log.
Using the external recorder, I was able to record a long take on this camera for over 6 hours, and I could have done longer if I had more space on my drive. For more info on this set-up, watch my DIY $200 Camera Rig video here.
Atomos Ninja Inferno monitor and recorder on BH Photo Video, Henry’s, eBay, Adorama, Amazon
Another problem with this camera is the 30-minute video record limit which can be easily disabled using the OpenMemories tweak app, which is free. For instructions on how to install the Open Memories Tweak app, please see the bottom of the article.
One last thing. At the end of the video, I also share a custom colour profile (I change the Gamma to Cine4 and the Color Mode to Pro). This profile looks great out of the a6500 and a6300, but also gives a better dynamic range and colors than the standard camera profile.
I hope you find this article helpful. Please let me know whether you’ve found other ways to address the shortcomings of the Sony a6500 and a6300.
The video below shows how to install the Timelapse and OpenMemories Tweak apps. The downloaded file also includes other apps that might be of use to you.
-
Steps For Installing the Apps:
- download the Graphic User Interface (pmca-gui-v0.16) program (versions for Windows and Mac)
- in camera, go to menu Setup tab on Page 4, then USB Connection – choose MTP
- connect camera to computer via USB cable
- run the Graphic User Interface program
- go to “Install app” tab and choose your app of choice in the drop-down menu
- click “Install selected app”
- once it’s finished, disconnect the camera
- in camera menu, go to Applications tab. Inside the Application List, you will now see your new app
Footage used in today’s video:
“LOCO” music video by Cesar Liam
See the full video here.
Timelapses by Akash Wadhwani
Check out Akash’s YouTube channel and website.
The download you link to is getting flagged for a virus when trying to download
Thanks for letting us know. However, we’re not getting such a warning. This is github repository, and Tom has used these apps without any problem. Also, the files passed a virus check on our computers (scanned using McAfee).
COOL! 1000 Thank you! Very helpful!
Awesome. Thank you so much for the time-lapse program.
Is it possible to install it even if my actual firmware for my a6500 is the version 1.01? Thanks in advance and keep up the great work!
Hello, where is the link of the plugin of time laps? Thank you
at the bottom of the article (below the video explaining how to install the app)
Lukas! I see the video but not see the link. I exausted jajaja . I think that not sleep more this night.
Hello
I have the monitor and some dummy batteries from China. It powers up a6000, but not a6500. Do you have any idea why?
Hello,
The first cable that I buyed not works, but the second it is working, i put you the link in amazon
https://www.amazon.es/gp/product/B074N6SBZ1/ref=oh_aui_detailpage_o04_s00?ie=UTF8&psc=1
reggards
I forgot to check notifications in case you answer, sorry for double posting
Hey there, thanks for the help but I can’t seem to resolve “insufficient permissions” error when installing the app on the GUI. Any ideas?
Hey there, I can’t seem to get past the “insufficient permissions” error message on the GUI when trying to install the timelapse app on my MacBook Pro. Any ideas? Thanks!!
The a6500 does have built-in timelapse. Sony just calls it, “Quick Motion.” Set the dial to Movie mode, then set the optional mode to one of the, “S&Q,” options. It offers Aperture Priority, Shutter Priority, or Manual, and let’s you set the framerate as slow as 1 fps or as fast as 120 fps while outputting a file in the movie codec and framerate you selected in menu settings, 24p, 30p or 60p. Go to S&Q settings in the menu, and you can set the framerate there from 1 fps, and it’ll take a frame once per second, add it to the movie file, and output a timelapse move. Or, you can set it to 120 fps and 24p, and it’ll give you a 24p movie file shot at 120fps for auto slow motion. In S&Q-M mode, it gives you full control over the shutter speed and f/stop. If you want the interval longer than 1s per frame, then yes, you’ll either need a different app, an external intervalometer or speed it up proportionately in post.
Okay, so I put my camera into MTP mode, and using the pmca-gui app it gets the proper device information.
After I select the TimeLapse app and click install, I get to “waiting for camera to switch…” and the camera screen goes blank.
I quickly get an “Operation timed out.”
And then the camera screen switches to “Application Download”, and the windows program no longer can see the camera…
It is nice tips n tricks
The installation is failing on my a6500. I have the latest firmware. Is this tool outdated?
Really Cool
timelapse app does not work.
actually it never managed to get installed in my camera.
I use a sonya6300 with the latest firmware. (Ver.2.01)
update on my previous comment.
the installation worked properly on my a6300.
drive mode needs to be set to “single shooting”
internet connection seems to be necessary even if you have already downloaded the app to your desktop and trying to install it to the camera.
Hi, if i combine all the tricks : Hdmi recorder (no internal) + dummy battery + cage + screen off + auto focus disable etc etc. Do you think i will be able to record live shows in a hot venue (3 hours at leat needed) with the A6300 without overheating ? My plan is to use the 4k footage and crop in with livestream studio software making a 1080p virtual paning and such…
my plan B for my budget is the G85 but since i will crop in the 4k image i think the extra resolution of the a6300 would be best… if it can make it wityhout overheating.
thank you
can the camera just be stopped and restarted right away to get around the 30 minute issue?
yes that can be done but of course it would result in a few frames being lost while you stop and start the camera.
Thanks for this, very helpful, removed the 29:50 video recording limit was a breeze after reading this!